How to Set Up a Proxy Server: Configure, Test, and Restore
To set up a proxy server safely, first save the current network state and collect the exact connection details you were assigned: host, port, protocol, and authentication method. Configure those values at either the application or operating-system layer, test the connection and observed exit separately, and keep a clear path back to the original settings.
This guide uses fictitious values only. Replace them with your assigned details, and do not copy real passwords into notes, screenshots, logs, or source repositories.
Start with the answer: save the current network state
Proxy setup is easier to troubleshoot when it is treated as a reversible configuration change. Before editing anything, record whether automatic detection is enabled, whether a setup script or PAC URL is present, whether a manual proxy is active, and which hosts are excluded from proxy use. A screenshot can help, but redact any real credentials before storing or sharing it.
If the device is managed by an employer, school, or another administrator, stop when a control is locked or marked as managed. Do not replace, disable, or work around that control. Ask the administrator which layer should be configured and which values are approved.
Before you begin, confirm what each assigned host, port, protocol, and authentication field means in the current assignment. Do not infer a field from an older example.
Step 1: Collect the Assigned Host, Port, Protocol, and Authentication

Do not guess missing values. A proxy address is not complete unless the application knows where to connect, how to connect, and whether credentials are required. Put the assigned information into a temporary checklist and verify it against the provider or administrator's current instructions.
| Field | Fictitious example | What to confirm |
|---|---|---|
| Host | | Use the exact hostname or IP address assigned to you. Do not add a scheme unless the input asks for one. |
| Port | | Keep it separate from the host when the interface provides a dedicated port field. |
| Protocol | | Select only the protocol documented for this endpoint. Similar-looking options are not interchangeable. |
| Authentication | | Confirm whether the endpoint uses a username and password, another approved method, or no client-entered credential. |
| Scope | One application or the operating system | Decide which traffic should use the proxy before changing settings. |
The OWASP Secrets Management Cheat Sheet explains why credentials should not be hard-coded or exposed in logs. Store real credentials only in an approved secret or password-management process.
Step 2: Choose Application-Level or Operating-System Setup
Use application-level setup when one supported application should use the proxy and that application provides its own documented proxy fields. Use operating-system setup when the intended applications are designed to inherit the system network proxy. Do not configure both layers by default: overlapping settings can make it difficult to tell which value is active.
On Windows, Microsoft documents automatic detection, setup-script, and manual proxy options under the operating-system network settings. On macOS, Apple documents proxy options per network service, including server, port, optional authentication, and bypass hosts. Follow the instructions for the operating system version actually in use, because menu labels can change.
If a field is unclear, stop before saving and ask the issuer to identify the host, port, protocol, and authentication value explicitly.
Step 3: Enter the Proxy Details Without Overriding Managed Controls
- Open the documented proxy settings for the chosen application or network service.
- Select the mode that matches the assignment: automatic discovery, approved setup script, or manual entry. Do not convert one mode into another on your own.
- Enter in the host field and
proxy.example.netin the port field as fictitious examples. In a real setup, use the exact assigned values.12345 - Select only the assigned protocol. If the interface does not offer the documented protocol, stop and confirm compatibility rather than choosing the nearest label.
- Enter the assigned authentication details only when the interface asks for them. Never paste a real password into a URL, shared screenshot, shell history, or article draft.
- Preserve the existing bypass list and local-network behavior unless the administrator's current instructions explicitly change them.
- Save or apply the settings, then restart only the affected application if its documentation requires it.
This tutorial does not assert that IPIPD supports any particular protocol or authentication mode. IPIPD's current confirmed product scope is static IP and VPS. VPS is a server product, not a proxy credential or a residential substitute. The endpoint's protocol, authentication method, and network classification must come from the actual assignment or current product evidence.
Step 4: Test the Connection and Observe the Exit Separately
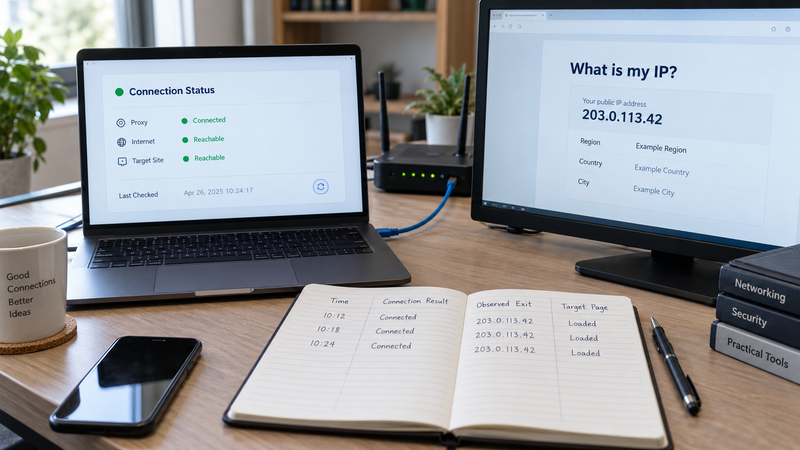
Run the smallest permitted test first. Open a low-risk page that the application is authorized to access, note the time, and confirm whether a response is returned. A successful response shows that some part of the route works; it does not prove that every application, target, or page will work.
Next, use an organization-approved exit-observation page or internal endpoint. Record the observed IP and timestamp, then compare them with the assignment. Treat this as an observation, not as proof of anonymity, location accuracy, account safety, or target-site acceptance.
Keep three results separate:
- Settings saved: the interface accepted the host, port, protocol, and authentication fields.
- Connection established: a permitted request received a response through the intended configuration.
- Exit observed: an approved observation endpoint reported the expected assigned address or an explainable result.
If these results disagree, do not keep changing multiple fields at once. Record the mismatch and move to the troubleshooting sequence.
Step 5: Troubleshoot One Layer at a Time
| Symptom | First check | Next safe action |
|---|---|---|
| Nothing connects | Host spelling, port, active network, and whether the chosen application actually uses this settings layer | Compare every field with the assignment; restore the original state before testing a different layer. |
| 407 Proxy Authentication Required | Username, password, authentication method, credential expiry, and accidental spaces | Re-enter the assigned values securely or ask the administrator to confirm the account. Do not repeatedly guess credentials. |
| Some applications connect, others do not | Application-level versus system-level scope and any application-specific setting | Use the application's current documentation; do not assume every program inherits the same setting. |
| Connection works but the observed exit is unexpected | Whether another proxy setting, setup script, bypass rule, or cached application session is active | Close the affected application, confirm one active configuration path, and repeat one controlled observation. |
| Settings are locked | Managed-device notice or organization policy | Stop and contact the administrator. Do not attempt to remove the control. |
RFC 9110 defines 407 Proxy Authentication Required as a proxy authentication challenge. It is not the same as proof that the host and port are correct in every other respect, so check the assigned fields and the active configuration layer as well.
Step 6: Restore the Original Settings
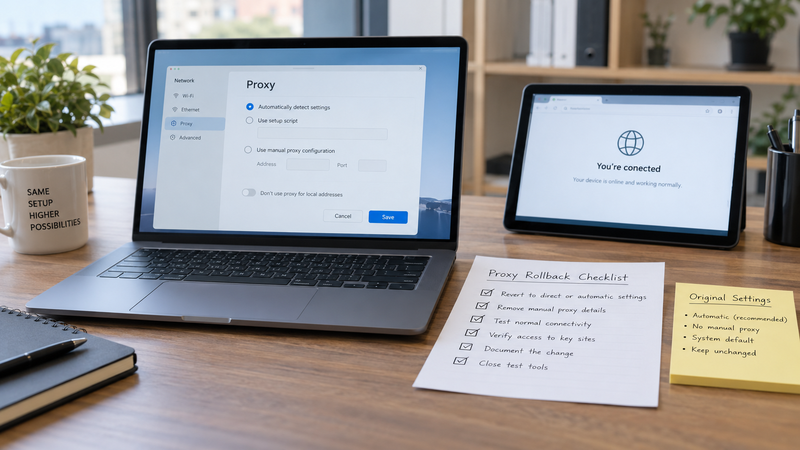
Restore the network state when the task ends, when a test cannot be explained, or before trying a different configuration layer.
- Open the same application or network-service settings used for the test.
- Remove or disable only the manual values added for this test.
- Restore automatic detection, the approved setup-script URL, bypass hosts, and local-network behavior exactly as recorded.
- Close and reopen the affected application if required.
- Repeat the original direct-connection baseline and record the result.
- Delete temporary notes containing credentials. Keep only non-secret evidence such as time, configuration scope, and pass/fail outcome.
If the original state cannot be restored or the device remains unable to connect, stop further edits and give the saved before-and-after record to the administrator.
Proxy Setup Quick Reference
- Before editing
- Save automatic, script, manual, bypass, and managed-control status.
- Required assignment
- Host, port, protocol, authentication method, and intended configuration scope.
- Safe example
- , port
proxy.example.net, user12345, passworddemo-user.example-only-do-not-use - Verification
- Separate settings saved, connection established, and exit observed.
- Stop conditions
- Managed controls, unknown protocol, unexplained access restriction, repeated authentication failure, or inability to restore the original state.
For more setup material, browse the IPIPD tutorial index.
FAQ
What information do I need before setting up a proxy server?
You need the assigned host, port, protocol, authentication method, and the intended configuration scope. Save the current automatic, script, manual, and bypass settings before making changes.
What does a 407 Proxy Authentication Required response mean?
It means the proxy is requesting client authentication. Check the assigned username, password, authentication method, credential status, and active configuration layer instead of repeatedly guessing credentials.
How do I turn off the proxy and restore my original settings?
Return to the same settings layer, remove only the manual values added for the test, and restore the recorded automatic detection, setup script, bypass list, and local-network behavior. Then repeat the original direct-connection baseline.
Should I configure the proxy in both the application and the operating system?
Usually no. Choose the layer required by the current application or assignment, because configuring both can make troubleshooting harder. Use both only when current documentation explicitly requires it.